Getting Familiar With The Floor: How To Get Your First Handstand
Getting Familiar With The Floor: How To Get Your First Handstand
The handstand is one of the ultimate expressions of skill, tension and balance. Used in gymnastics, calisthenics and other sporting disciplines worldwide, the handstand is a true accolade of knowing one’s body and how to manipulate it.
Not only is the handstand fantastic for working our push strength through the shoulders, but it promotes shoulder mobility and rotator cuff strength. Handstands also add to our bone strength, wrist mobility and spinal control, as well as allowing the expansion of the diaphragm when upside down, allowing greater blood flow through the upper body adding great benefits, not only to circulation, but to organ health as well.
If you want to start to learn the Handstand, get used to being upside down. You can do that from the drills and progressions I’m going to cover in this article. But you can start from the rings by skinning the cat and holding yourself upside down as well. Bear in mind, this is only the first step and these drills are vital to learn to get you to that first handstand.
We need to start by breaking down the movement;
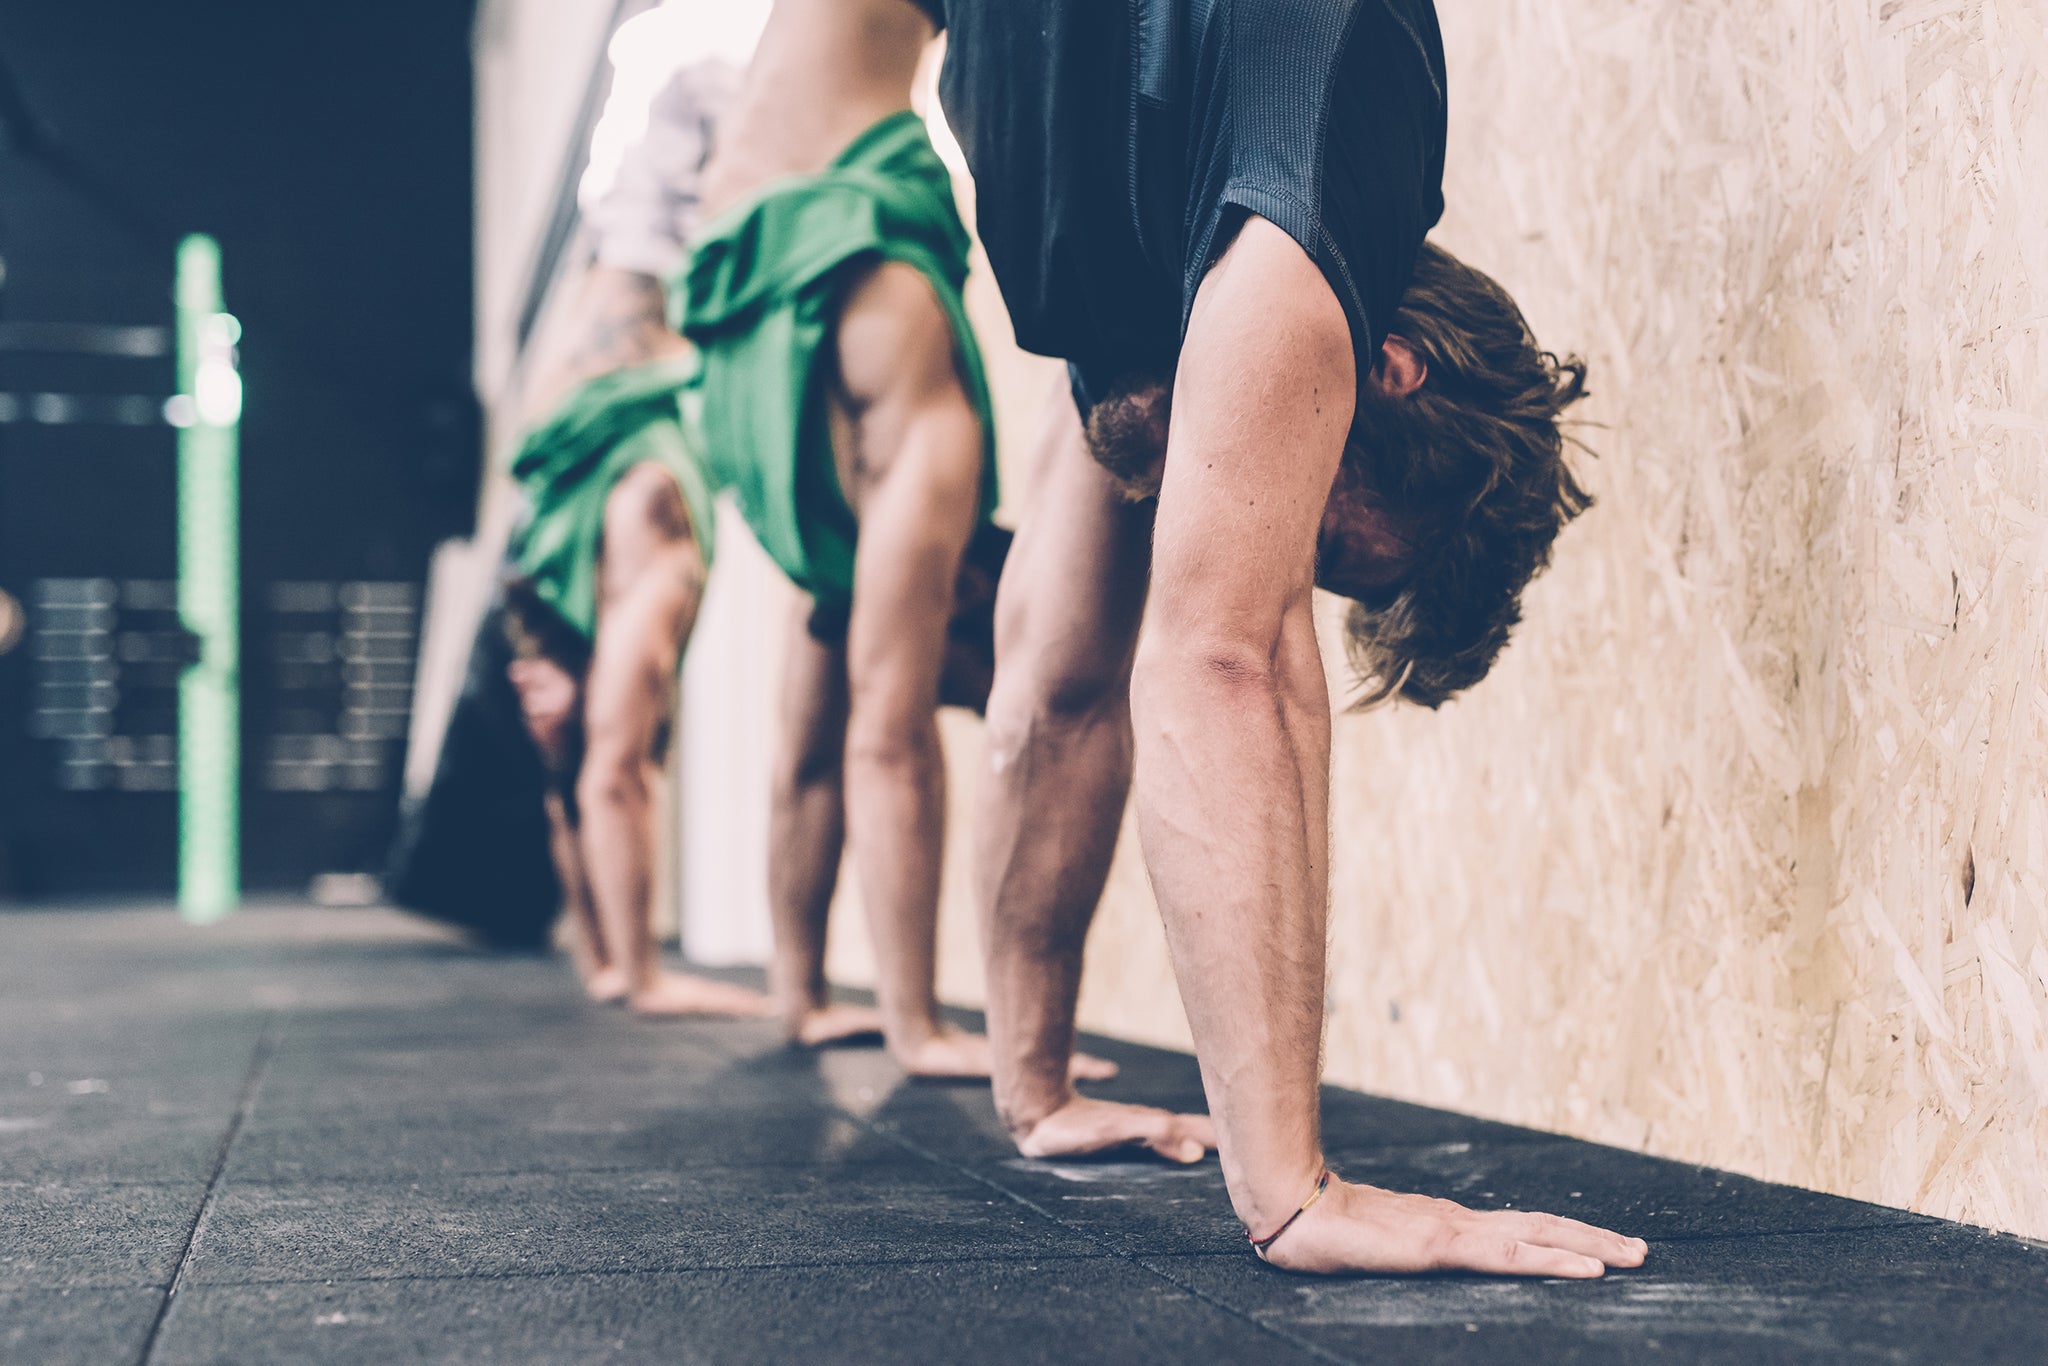
The kick up, and learning to bail out come first. For the kick up, start with your hands just over shoulder width apart with your fingers pointing towards the wall. I would say you want to be between 30 and 50 centimetres away from the wall. This is because, when you kick up, you want to be looking between your two index fingers, so you will need space for your head to come forward. Next, squeeze in your fingers, and keep your palms flat to the ground, this will help with balancing later on. Then from a pike position, spring up and push yourself forward on one leg. You need to bring your hips up towards the wall to align yourself from the hips, up through the spine to the shoulders and wrists. Your heels will then be in contact with the wall. You can experiment here and get a feel for not only being upside down but also your alignment. Definitely film yourself practising, so you can see which areas need work, strengthening and correction.
Establish your shoulder position, elevation, upper body balance and hand position before starting to engage the hips and spine. Then you can start to gently pull your heels away from the wall one at a time. Over time you can look to bend one knee to come away from the wall a bit further.
This all sounds more complicated in words than it will be in practice, as the wall be there to catch you if you over correct. Using the wall you can then adjust your balance and body position to find your balance points. What you don’t want to do is become over reliant on the wall as it will become a crutch.
Before we move onto having your chest face the wall instead, we need to learn to bail with control. Learning to cartwheel is key here. You will also need to learn how to move from that upside down position to each side by simply moving weight to one side. Kicking up away from anything and embracing the bail are tricky, so make sure you’re in a safe and controlled environment before attempting this. Backward and forward rolls are also useful to learn too as this way you can learn to tuck your neck to avoid injuries, and learn that your fall distance actually isn’t that high. Sometimes the body can be pretty silly, it needs coaching to know what positions it can achieve in certain situations.
Next you want to work on walking up the wall, with your chest facing it as opposed to your back against the wall. This stage of learning to handstand is key because hip and spinal alignment can only be perfected this way round, because bums aren’t flat so can’t be aligned properly when performing handstands against the wall. Shoulder mobility and strength also need to be worked on here to make sure we are in correct alignment; work on shoulder protraction to push the ground away from you. Overhead shoulder shrugs with weight or resistance bands are great for this. You can also perform handstand muscle engagement just standing on the floor and creating whole body tension with your arms overhead, as well as hollow body holds and scapula drills too. Bring Pike Push Ups, Compression Strength drills and shoulder presses into your workouts as extra single exercises, as well as anything that works the serratus anterior! These will help you get the strength to get to the Handstand Press and Handstand Push Ups further on in your training journey.
When you’ve walked up the wall, make sure there’s ample space to bail, if you need to, on either side of you. Once you have mastered this position you can look to incorporate Handstand Push Ups, once you have the strength. Always start with negative reps first so let your forehead gently come down to the floor and then bail out. When your legs are straight, with your shoulders and hips aligned, start gently bringing your toes away from the wall and squeezing through those flat palms and gripped fingers. You can correct your balance through your hands, so you’ll have to experiment with finding your balance points. Then you can start moving your legs into different positions, such as a straddle or by bending the knees.
Keep working on your mobility and flexibility. Yoga can be really helpful in this regard. Learn how you’re body operates under tension, and in piked positions. I would highly recommend finding a coach to help you get to your first handstand as it’s very hard to observe, especially when starting out. There are some fantastic hand balancers and coaches out there to help you, so just make sure you do your research and find one that resonates with you, and helps you feel comfortable. Going upside down is pretty scary at first, so you need a coach who will support you through that.
We would live to see how you get on with getting to your handstands so tag us @gravity.fitness on Insta!


